29 March 2013

Easter Special Checkered Nails


I came across this nail kit at "The Face Shop" last week and since it's Easter this sunday, this will be a great theme. The kit has three pastel colors that suits the Easter motif plus the checkered design looks like easter eggs. :)

Pastel Check 
I also took a photo of the procedure from the shop 'coz the one at the back of the box is in Korean language.


So here is my step by step photos on how to apply this nail kit. I've used Pattern 2 from the guide above.


Note: It is very easy to apply and it dries quickly so you won't need to worry when it overlaps.


...and it's done. Just add a thin layer of top coat.


Have fun!!! :)

23 March 2013

Nail Marbling


Have you tried a nail marbling yet? I did. :) Although it is a bit tricky, it's honestly fun to do once in a while. The first time I've tried that, it took me 2-3 hours as the colors tend to mix altogether and ends up looking like mud so I kept repeating the process. I seriously feel like you'll need a lot of patience doing this.

Here's how I did my recent nail marbling.

Materials used:
Toothpick, Tape & A glass of water
Nail polish used:

Nail 009 (BK), Step Right Up (OPI)
Repair Nails Face it Top Coat (Face Shop)

Procedure:
  • Cover your fingers with tape completely leaving only the nails.
  • Put a drop of nail polish on a glass of water then add another drop of a different nail polish on top of the first one & repeat for several times. Note: Not all nail polish works well so u have to try & test.
  • Using a toothpick, lightly create a line pattern by dividing the nail polish as shown below. Repeat as many lines as you want.
  • After creating your line pattern, dip your nail in the water for the pattern to transfer into your nail. Using the same toothpick, remove the excess nail polish while your nail is submerged in the water.

Note: It is best to use a tape to avoid creating a mess while doing your nail marbling. Here's how it looks like without the tape. :P

Disaster!!!

  • Remove the tape & clean the excess nail polish around your finger.
  • Let it dry for a while then apply a top coat.

Have fun!!!

17 March 2013

Gradient Nails

I've been wanting to do the gradient nails for quite some time now, I've tried using sponge and gradient nail brush but it's just too much work. Good thing my brother's girlfriend bought a gradient nail polish from etude house so I was able to try it too and here's how it looked like:


I was so happy about it so I wanted to try other brands as well, so I got these for S$9.90:


These are quite easy to apply, they're labeled as A, B & C.


And here's how it looks like after applying:


Lastly, applying a thin layer of top coat to finish the look.


Just a little sunshine

This nail polish is so cool... It's just like magic :) 'coz it changes color under the sun. I'm just not sure how much this costs 'coz I only got it as a gift.


To put it to the test, I used nail stickers on my entire nails and use this color changing nail polish as a top coat then we went cycling.


See the difference? It turned pinkish red under the sun as if it was burning. Cool right :)

I heard they have different colors too.

Nail stamping

Another fun stuff to have are these...


Nail stamping is a great way to get a nice and easy set of nails. I got these online from qoo10 (formerly known as Gmarket). They are affordable & easy to use.

Here's what I did:


Glow in the dark


As I was searching the web for some nail art designs, I got intrigued with the glow in the dark nail polish and got myself these:


Using my ever reliable nail stickers & these glow in the dark nail polish as a top coat, here's how it looked like.


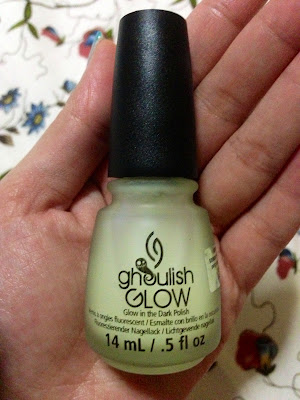
I recently bought this china glaze glow in the dark polish but have yet to try.


Nail Stickers

Nail Stickers makes life easier. :) In just minutes, you'll have a nice looking set of nails like those in the nail salons. Plus, they're also cheap like just S$2.00 each.

So, I invested some...


Here are some of my nail sticker nail art:


I'll share how I did this next time. :)

Dots the way

There was a time when Jessie J's price tag was a hit, I noticed her nails and I decided to make my own version of it.

Here are the colors and tools I've used:

Nail Polish: Black & White, Top Coat
Dotting Tools

And here's how I did it:
  • I've painted my nails black and made sure that they're dry before going to the next step. 
  • In a clean sheet of paper, I placed a drop of the white nail polish and dipped the dotting tool in it then carefully dot it on my nails.
  • After finishing the dots I've used the top coat finish it off.


Here is another version using the same nail color and tools with the dots in different sizes.


Simply Clean Nails

I normally do my own nails every week but when I'm lazy :) or I have no time to maintain it, I make sure that I cut it short. So, when I want to have long nails but don't have the luxury for nail art, here's how I keep it:

Face shop's nail strengthener, base coat, top coat (from left to right)

I just apply these three products (S$2.90 each bottle) starting from the nail strengthener followed by the base coat and then the top coat.

Some people say that you can just use either the nail strengthener or the base coat but my nails chip easily so I normally use both :P

After applying the three products above

In just minutes, my nails look shiny & clean.