23 March 2014

Choco Glitter Nails


After 3 months of neglecting my nail blog due to a super busy schedule, I'm once again excited to share my recent nail art with you guys. I named this design "Choco Glitter Nails"

Nail Polishes & Materials:

Nude Shimmery Nail Polish from Etude House, Glittery Nail Polish from Etude House, Wanna Say Hello from Essence Cosmetics, Help My Finger Top Coat from Etude House, Nail Jewels and Dotting Tools

Here's how:


I first applied a base coat to protect my nails.


I then applied 2 coats of Wanna Say Hello to my pinky nail, 3 coats of the Nude Shimmery Nail Polish on my thumb, pointer and ring nails and 2 coats of the Glittery Nail Polish on my middle nail.


I applied a layer of top coat on my thumb and quickly added a nail jewel at the center of the nail. After making sure that it is dry, I applied another layer or top coat to seal-in the nail jewel.


With a dotting tool, I added some dots on my pointer nail using the Wanna Say Hello nail polish. 


On my ring nail, I created a simple heart using the Wanna Say Hello nail polish. 
To do this, I first added 2 joining dots with a bigger point dotting tool. Then, with a smaller point dotting tool, I connected the lower part of the 2 dots by creating a v-shape and filling in the center of that v-shape.


After making sure that everything is dry, I applied a layer of top coat to add more shine and make it last for a week or so.

Have fun!! :)


23 December 2013

Zig-zag Tree Nails


Hello friends! I've been browsing pinterest lately and I saw a lot of gorgeous christmas nails there. I got inspired by the christmas tree theme this time so I want to try one out. This is my 4th christmas themed nails for the season. I call it the "Zig-zag Tree Nails"

Here are the nail colors that I've used.

Base Coat, Essie Good As Gold, Essence Redvolution,
Essence Me & My Lover, Essence The Green and the Grunge
and Etude House Clear Shimmery Clear Polish

Here are the other materials that I've used.

Masking Tape, Striping Tape, Pointed Nipper
& Glittery Nail Polish
I started by painting my nails with 2 coats of a Essie's Good as Gold, for the ring finger I painted it with a coat of Essence's Redvolution and a coat of Essence Me & My Lover.


I then cut some masking tape and placed them on each nail making a triangular shape.

Then, I cut strips of the striping tape and sticked them on my nails in a zig zag manner.

After that, I put 1 coat of Essense's The Green and The Grunge.


I waited for the nail polish to be completely dry before removing the masking tape and the striping tape.


I then painted a layer of the Etude House Shimmery Clear Polish to soften harsh edges.

I took a Glitter from one of my glittery nail polish and placed them on top of each tree.


Lastly, I used the Etude House Shimmery Clear Polish as a top coat to finish the look.


Have fun! :)


14 December 2013

Santa Nails


Time for a new nail design again guys. It's my 3rd nail art theme this christmas season and this is the "Santa Nails".

Let's begin.

Here are the brushes I've used for this design.

From top to bottom: Short striper brush, flat brush, thin small brush,
big, medium and small point dotting tool

After a layer of base coat, I painted 2 coats of white nail polish (Essie: Blanc) on every nail except the thumb which I painted with a very light nude color (Essence Nude Glam: Cotton Candy).

Face it Base Coat, Essence Nude Glam: Cotton Candy, Essie: Blanc
Moving forward to the Santa robe, here are the nail polishes I've used:

Essence: Fame Fatal, OPI: Black Onyx, Essie: Good As Gold,
Etude House Shimmery Clear Polish

With a red nail polish (Essence: Fame Fatal), I made a vertical line on each side of the nail leaving a small portion of a white color in the center.


On a clean sheet of paper, I placed a drop of a black polish (OPI: Black Onyx). Then, with a striper brush, I made a horizontal line across the lower part of my nail. 


Next, I placed a drop of a gold polish (Essie: Good As Gold) on the same sheet of paper that I've used before. Then, with a flat brush, I created a square on the center of the black line. After that, I added a small line from the center connecting to the right side of the square.


After making sure that they are dry, I added a layer of the Etude House Shimmery Clear Polish.


Moving on to the last nail (thumb part), I did Santa's face. Here are the nail polishes I've used.

Essence: Fame Fatal, Essie: Blanc, OPI: Black Onyx, 
Essence: Free Hugs, Etude House Shimmery Clear Polish

I painted the top 1/3 part of my nail with a red nail polish (Essence: Fame Fatal).
Using a medium point dotting tool, I added some connecting dots below the red polish with a white nail polish. This is now Santa's hat.


Using a bigger point dotting tool, I placed 2 dots on the lower center part of my nail. 

Then with a small thin brush I connected the center dots to Santa's hat (To do this, make a curved line from the center going to the side and upwards until you reach the hat part)

After that, I filled the tip of my nail with the same white polish. Now I have Santa's beard.


Using a big dotting tool, I added two dots of a black nail polish on the center of my nail above the beard. Then, with the smallest dotting tool and a white polish, I added a small dot on the lower part of the black dot.

Almost done! 

Using the same small point dotting tool, I made an oblong-like shape below the eyes to create a blushed cheeks. I've used a pink polish to do this (Essence: Free Hugs). Then with the same red polish that I've used earlier, I placed a small red dot on the center touching the beard part to create Santa's nose.


Lastly, I've sealed it with a layer of the Etude House Shimmery Clear Polish.


Have Fun!! :)


07 December 2013

Candy Cane Nails


Ho! Ho! Ho! Who wants some candy? :)

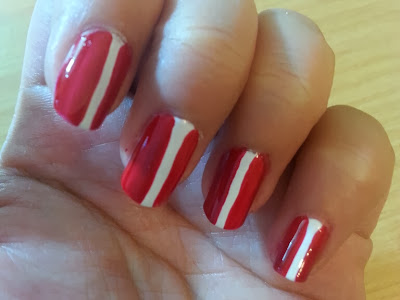
Hey guys! I did the famous christmas candy for my second nail theme this season. It's the Candy Cane Nails!

This is a very simple tutorial coz all you need to do is create slanting lines using green and red nail polish.

Here are the brushes and nail polishes I've used:

Scandal Cosmetic's top coat, Essie's Blanc,
Essence's Redvolution and the green & the grunge, Brush stripers

I applied 3 coats of white nail polish and I let them dry.


I then created some slanting lines using a striper brush dipped on a red nail polish. 

Note: You can do variations of thick and thin lines.


With the same procedure as above, I added more lines but this time using a green nail polish. 


After applying the same procedure to the rest of my nails, I added a layer of top coat and I'm done.


Have fun! :)


01 December 2013

Glittery Christmas Lights


As the holiday season is fast approaching, I plan to make several christmas themed nails. Let's start with this Glittery Christmas Lights theme. I will show all the nail polish that I've used as well as the brushes.

Striper brush & small nail brush

Here's how:

Left to right: OPI (Onyx Black), Etude House Shimmery
Clear Polish, Face it Base Coat


I first applied a layer of base coat, then a layer of a clear nail polish with shimmer from etude house. 


After applying the base coat
With the shimmery etude house clear polish

Using a striper brush and a black nail polish, add a thin line on each nail. It can be straight, wavy or curly.


Now moving on to the lights, here are the nail polishes that I've used.

Different colors from the face shop

With a clean sheet of paper, I placed a drop of red nail polish. Using the small nail brush, I gently put a dot of that nail polish on my nail adding a little tail to make it look like a tear-shaped christmas light.


Note: Slowly work on the lights as your hands may be a little bit shaky like mine ;)

With the same process as above, I created more lights using the other nail colors.


After the lights are done and dry. I added a layer of the shimmer clear polish that I've used earlier.

Left to right: The Face Shop top coat, Etude House
Glittery (Evening Dress), Essence (Party Princess)

I then applied 2 coats of Etude House (Evening Dress) and 1 coat of the Essence (Party Princess) on the tip of my nails like a french tip style.

After making sure that my nails are completely dry, I added a layer of top coat.


Hope you guys like this... Have fun! :)